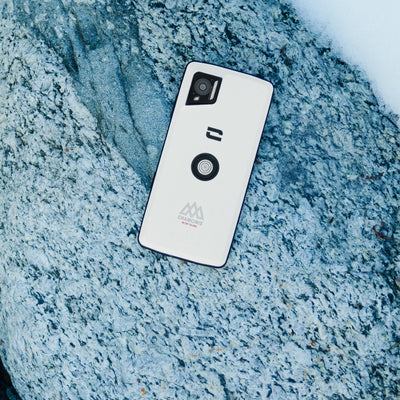
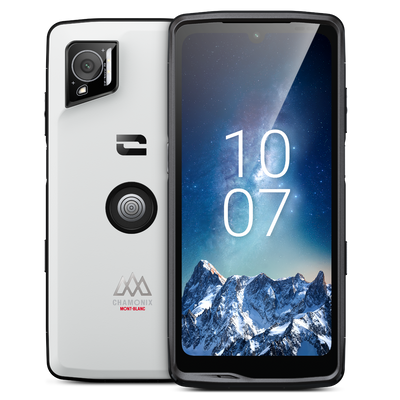
319,90€
Your basket is empty
Search on Crosscall
Search suggestion
Recommended for you
See all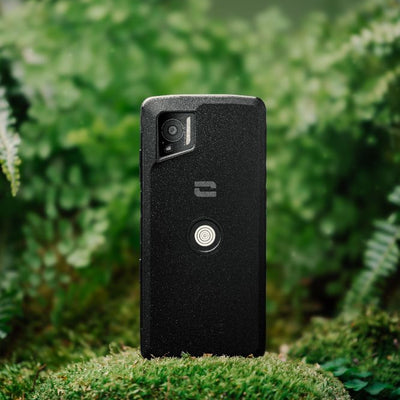

CROSSCALL RENEWS ITS GOLD BADGE IN THE "ANDROID ENTERPRISE PARTNER" PROGRAM
For the second consecutive year, Crosscall has received the "gold" badge from the Android Enterprise Partner Program. This distinction reaffirms the French manufacturer's commitment to providing efficient, secure, and durable solutions and products that meet the mobility needs of professionals. The Android Enterprise Partner program was established to support all companies wishing to equip themselves with mobile solutions and fleets. They can easily find partners who have not only successfully completed the commercial and technical training of Android Enterprise but have also demonstrated their ability to deploy technical solutions and specific product features, provide quality customer service, and succeed in the market. Crosscall equips many professionals across all sectors who praise the lifespan combined with performance and robustness of its products, such as SNCF agents, Leroy Merlin employees, and law enforcement officers from the National Police and Gendarmerie. These advantages have allowed the brand to become a reference in the B2B market and receive the Gold status in the new Android Enterprise program. Crosscall is the only French manufacturer to receive this distinction, which highlights the work done by the teams to meet Android Enterprise requirements and thus support professionals in their digital transformation. This status was awarded to Crosscall based on several criteria: - Expertise in the Android Enterprise environment: Crosscall teams have acquired in-depth knowledge of the Android Enterprise universe and regularly attend training to offer innovative solutions that perfectly meet companies' needs. - Product excellence: Crosscall devices are AER (Android Enterprise Recommended) certified, a certification guaranteeing the ease of deploying mobiles in companies as well as the security and durability of the devices. Crosscall's 5th generation devices come with a 5-year warranty and benefit from at least one OS upgrade and security patch updates for 5 years. The STELLAR-X5 benefits from 3 OS upgrades, allowing companies to have equipment with an extended lifespan and make a long-term investment. - Market success: with currently more than 100,000 Android Enterprise enrolled devices deployed in companies, Crosscall has been distinguished with the "Gold" badge of the Android Enterprise Partner program.

The Barcode Warehouse and Crosscall work together to provide British businesses and public sector organizations with robust and critical solutions designed for all environments. Crosscall designs and manufactures waterproof, rugged, and durable mobile phones and smartphones. Founded in 2009, the company quickly earned a reputation for creating devices capable of withstanding the toughest conditions. The range of smartphones and tablets is specially designed to endure the abuse of harsh and unpredictable environments. From freezing temperatures to scorching heat, dust, water, and drops, these devices are built to resist and keep functioning, thus minimizing downtime and maximizing productivity. Crosscall has a strong presence in France and is expanding its reach to other European countries. Crosscall currently supplies over 300,000 devices to clients such as Leroy Merlin, the European leader in home improvement retail, the SNCF, the French national railway company, and the French National Police. By becoming a reseller, The Barcode Warehouse expands Crosscall’s reach to British organizations that need mobile technology that is both rugged and durable. “After exploring Crosscall’s diverse product range designed to assist end users in their work, we are excited about their potential in the UK market. At a time when smart devices are becoming increasingly powerful, adding Crosscall to our portfolio was an obvious decision.” William Bevis, Partner Development Lead & Technical Trainer, The Barcode Warehouse. This offering builds on the 35 years of expertise of The Barcode Warehouse as a solutions integrator specializing in barcode technology, RFID, labeling, and enterprise mobility solutions, combined with Crosscall’s rugged and cutting-edge hardware, to equip businesses with the tools needed to streamline their operations and excel in demanding environments, from warehousing to manufacturing, field services, and public safety. “Crosscall is delighted about this strategic partnership with The Barcode Warehouse, a major player in enterprise mobility and managed services in the UK. By combining our solutions with their expertise and services, we offer an attractive proposition for organizations across various sectors. With our experience in other markets, we understand that customers seek added value and increased durability for their mobile devices, and the UK and Ireland are no exception. Our 5-year warranty and range of enterprise accessories meet these customer demands, and we are excited to introduce them to the UK and Ireland in collaboration with The Barcode Warehouse.” Denis Thayanithy, International Sales Director at Crosscall. Crosscall is committed to promoting a more sustainable telephony sector. By partnering with suppliers to ensure ethical production practices and educating customers on responsible consumption, Crosscall aims to minimize the environmental impact of its products. By designing rugged and durable devices that are easy to repair and recycle, the company seeks to reduce waste and extend product lifespans. The company’s commitment to sustainability is also demonstrated by its take-back programs, which refurbish end-of-life devices to extend their lifespan.
Smartphones: The New Challenges for Frontline Workers
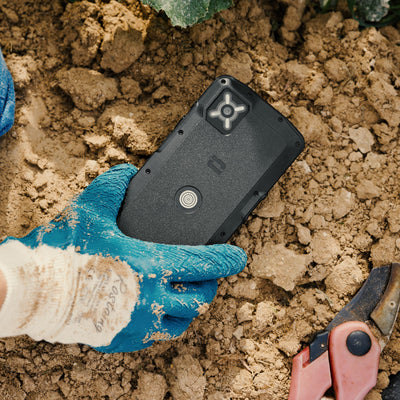
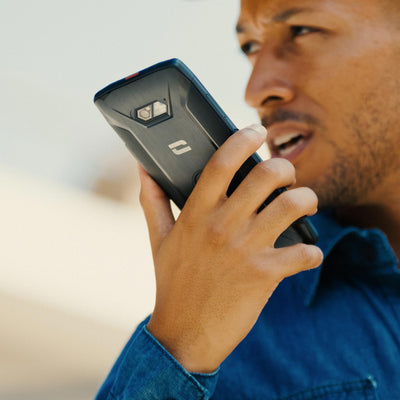
Millions of frontline workers worldwide work daily in direct contact with customers in an increasingly digital environment. For them, this underlying trend has a major impact: their ability to quickly access information as well as to share it as soon as possible. At the heart of this challenge is the smartphone they use and cost optimization. Retail salespeople, craftsmen working at private homes, maintenance agents in industry, delivery drivers, municipal police officers on the streets, cleaning staff, or home care aides... more than just a name, frontline workers are everywhere. Their work is essential with continuous streams of information. One thing is certain: digitalization has profoundly transformed their activity. First by making it easier, by combining many tools in a smartphone such as shared calendars, intervention reports, and of course by being able to communicate simply everywhere. While this trend is an advantage, it has also revealed a reality. Very often, in fact, the smartphone used is not suited to the actual usage conditions. The consequence: irregular availability of equipment, breakages, uncompleted tasks therefore not billed, without underestimating the impact of frustrations for customers, users, and those handling complaints and after-sales service. For Crosscall, this comprehensive approach covering the entire usage period of equipment is central. The goal is to optimize the cost of this equipment as much as possible throughout its entire usage cycle. COMPARE WARRANTIES AND THEIR DURATION Worldwide, most countries require electronic equipment manufacturers to provide a minimum two-year warranty. However, studies show that users keep their devices longer. As a result, part of the usage period will no longer be covered by the warranty in case of failure. This will therefore increase... the cost of ownership. By offering a 5-year warranty on its products, and especially by including the battery in this coverage, Crosscall innovates as it is the only manufacturer on the market to commit to such a duration. DAILY DURABILITY When working face-to-face with customers, outdoors, in a store, or at home, shocks and drops are inevitable. The equipment must meet this specification, like the STELLAR-X5, which is used notably by SNCF. Durability relies heavily on design details that often go unnoticed, such as a screwed intermediate case instead of a glued one. At purchase? Visually no difference. Over time, however, the advantage is major with greater resistance to external damage, shocks, and dust infiltration. "A Crosscall smartphone can replace up to 5 devices" STUDY THE NUMBER OF DEVICES THE SMARTPHONE CAN REPLACE The best purchase in terms of savings is the one you don’t make. The lightest equipment is the one you don’t carry. From these two common-sense remarks, the French brand developed an offer, Crosscall-In-One. The approach? Streamline the number of devices by simplifying daily use. A Crosscall device can thus replace a walkie-talkie, a barcode scanner, or even a PC, with its X-SPACE interface. CHOOSE TECHNOLOGIES SUITED TO USES Wi-Fi 5 or 6/6E, 4 or 5G, VoWi-Fi, Bluetooth 5.0 or 5.2, MIMO, SISO... it's hard to make the right choice. Yet, every decision impacts the mission of a frontline worker. For example, Wi-Fi 5 compared to Wi-Fi 6/6E. Wi-Fi 5 is more than enough for people mainly using cellular data. However, someone working in a warehouse covered by a modern private network will benefit from being equipped with Wi-Fi 6/6E with ultra-fast speeds. The strength of the Crosscall range? Checking many boxes for frontline workers while always focusing on adapting products to field uses, not the other way around. CONSIDER THE USER EXPERIENCE One of the questions to ask early on is how the equipment selected for a fleet will be perceived by its future user. If the first reaction is rejection, the investment is totally counterproductive. If, on the contrary, the user is involved very early, including from the design phase, it’s a win. This is how Crosscall won a major contract with Leroy Merlin, equipping 30,000 employees. IDENTIFY THE ESSENTIAL FEATURES What makes the difference with Crosscall is probably the small details, each thought out by the product teams. For frontline workers, they represent real assets daily. On the comfort side, leash loops allow carrying a smartphone around the neck. The ultra-hardened screen protector glass prevents scratches. The battery life is designed for worry-free use throughout the day. It is 25h48 for the CORE-M5 in 2G/3G communication. It’s no coincidence that Crosscall products are used by many firefighters or the BRI. CONSIDER THE PRICE OF ACCESSORIES When you say smartphone, you also say accessory ecosystem. This from two angles. The first is the range breadth allowing to meet multiple uses such as mounting on different supports, recharging one or more devices. Another possibility: reduce the equipment used by rationalizing their number like with an X-SCAN optical reader making a classic scanner unnecessary. The second angle becomes central: the price. And again, Crosscall products have two strong arguments, durability and reliability! Since they are robust by nature, they don’t need a case. This is an indirect saving with an immediate financial advantage.

Crosscall partners with BT to offer its range of rugged smartphones to British businesses
Crosscall, the leading European manufacturer of rugged smartphones for businesses, has announced a new collaboration with BT. As part of this agreement, Crosscall’s range of affordable, durable, and robust mobile devices will be available for the first time to UK businesses. Available to BT customers from September 30, Crosscall phones are uniquely designed with a focus on durability. Built to support users over the long term, all the brand’s smartphones and tablets come with a 5-year warranty, including issues related to the phone’s battery lifespan. Crosscall devices are also designed to be easy to repair, to extend their lifespan and reduce replacements. The brand is also committed to ensuring spare parts availability for 10 years. Crosscall’s latest innovative smartphone, the STELLAR-X5, contains 26% recycled materials. These ongoing eco-design efforts as part of a strong CSR policy earned the company a gold medal from Ecovadis, a globally recognized CSR rating organization. Crosscall ranks in the top 5% of companies with the best CSR performance among more than 130,000 companies evaluated. This accreditation also complements BT’s ambitious net-zero strategy. Through its collaboration with BT, Crosscall aims to provide exceptional service and robust technology to businesses operating in challenging environments in both the public and private sectors. Crosscall currently supplies over 300,000 devices to clients such as Leroy Merlin, Europe’s leading home improvement retailer, SNCF, the French national railway company, and the French national police. Sally Fuller from BT said: “As the first operator in the UK to sell Crosscall phones, this partnership offers a unique opportunity for BT customers to purchase market-leading rugged devices with extended warranties. Crosscall’s impressive sustainability credentials also build on our existing initiatives, which aim not only to reduce our own carbon emissions but also those of our customers and partners. Matthew Burchell from Crosscall said: “This collaboration with BT is a real opportunity for Crosscall to meet the needs of UK businesses and professionals seeking a more sustainable alternative in telephony. Our ambition is to replicate the successes achieved in Europe and become a UK leader in enterprise technology. Crosscall will be present at the Emergency Tech Show on September 18 and 19 in Birmingham to meet key players in public and private security and showcase its innovative communication solutions. About CrosscallCrosscall is a French manufacturer offering waterproof, rugged mobile phones with long battery life. Founded in 2009 by Cyril Vidal and based in Aix-en-Provence, the brand develops models suited to the harsh and unpredictable conditions faced by athletes and professionals in the field (water, rain, wind, humidity, dust, shocks...). Crosscall has sold over 4.5 million mobile devices in more than 20,000 retail outlets and generated revenue of 114 million euros. About BT GroupBT Group is the UK’s leading provider of fixed and mobile telecommunications and related secure digital products, solutions, and services. We also provide managed telecommunications, security, network, and IT infrastructure services to customers in 180 countries.The BT Group consists of three customer-focused units: Consumer serves individuals and families in the UK; Business covers enterprises and public services in the UK and abroad; Openreach is a wholly owned independent subsidiary that wholesales fixed access infrastructure services to its customers—over 700 communications providers in the UK.British Telecommunications plc is a wholly owned subsidiary of BT Group plc and encompasses virtually all of BT Group’s operations and assets. BT Group plc is listed on the London Stock Exchange.For more information, visit www.bt.com/about

Mâcon 2024: Addressing the Challenges of Firefighters
Crosscall will be present from September 25 to 28, 2024, at the 130th firefighters’ congress. For the French brand already equipping many SDIS in France, it’s an opportunity to share its security expertise serving the population while highlighting the performance of its offer. Interview with Denis Thayanithy, Chief Commercial Officer of Crosscall. The budget advantage of products less prone to breakage How do Crosscall products meet the operational needs of SDIS in France, and more broadly the civil security actors? "Today, professionals in this sector want products that are both financially accessible and resistant under extreme usage conditions. That’s exactly what we offer with robust smartphones and tablets that withstand shocks, drops, and liquids. Reliability is in Crosscall’s DNA. It has built the success of our brand, as shown by our 5-year warranty that also covers the battery. This means that by choosing Crosscall equipment, an SDIS will optimize its budget with gear they can keep longer, less prone to breakage, and more broadly protected against all risks related to daily interventions on any type of terrain. Over the months, this quickly adds up to thousands of euros." The user at the heart of Crosscall's approach What makes Crosscall's approach particularly appreciated, beyond the central focus on product durability? "We never forget that behind one of our devices, there are women and men whose job is to save lives. This represents a real responsibility for the Crosscall teams. That is why we invest time in human relationships. It allows us to build close ties, essential to provide solutions tailored to the specific needs of an SDIS. This is the whole point of choosing a French brand relying on a perfect network across the territory. In this strategic sector of civil security, we aim to develop real long-term partnerships. And it usually all starts with a meeting. It is thanks to this commitment on the ground that we now collaborate with many SDIS throughout France. Crosscall also participates in major projects like the Fenics project in close relation with SDIS 73, SDMIS, SDIS 74, and SDIS 13." Replace up to 5 existing devices How does Crosscall address the challenge of cost optimization through equipment rationalization? There are two ways to look at this issue. The first is to drastically reduce the number of new devices or slow down the replacement rate of those already in operation. For Crosscall, the answer comes from a study of usage to always optimize the available equipment. We invent increasingly versatile products. Thus, a Crosscall phone can replace up to 5 existing devices. For example, it can substitute for a walkie-talkie, a barcode scanner, or even replace a computer with a simple connection to a screen. For Crosscall tablets, the approach is the same. Our teams notably collaborated with an SDIS to implement a cardiovascular data collection solution during the medical care of victims. Thanks to this, professionals can share a complete report with their colleagues at SAMU in particular. We thus address a real interoperability challenge while contributing to the optimization of operating costs. Another very concrete example is our CORE-T5 tablet used as a training support.

Crosscall wins a historic 5-year contract with SNCF for 23,000 durable smartphones
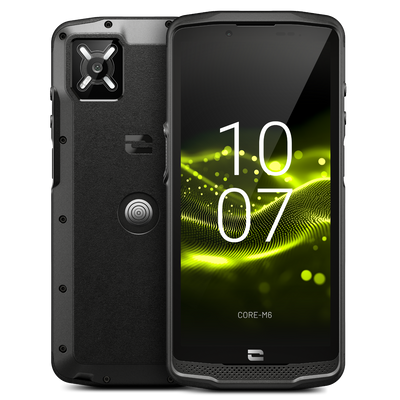
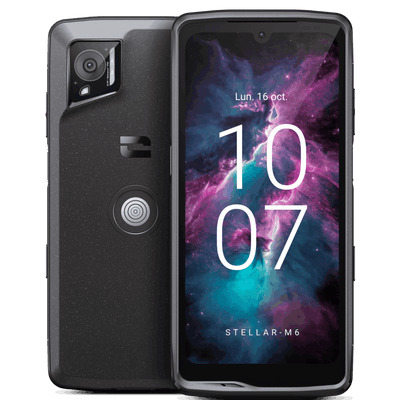
SNCF renews its trust in Crosscall, selecting the STELLAR-X5 smartphone to equip 23,000 Customer Relations agents in the TGV-Intercités and TER activities. This new 5-year contract marks an unprecedented step in corporate telephony, highlighting the reliability and performance of Crosscall devices. The long-term partnership between SNCF and the French manufacturer illustrates a significant advance towards a more sustainable and responsible purchasing policy in the telecommunications sector. An unprecedented contract duration and high-performance smartphones Crosscall has been selected for the second time by SNCF, which demonstrates the trust placed in its products. This 5-year contract is exceptional in the sector, where fleets are generally replaced every 3 years. Crosscall smartphones, known for their durability, proved their reliability during the previous 2019 contract. Crosscall’s after-sales service certified by Service France Garanti recorded very low failure rates, allowing a one-year extension without negatively impacting the agents' operational capability. This success demonstrates Crosscall’s commitment to offering high-quality products capable of meeting the demanding needs of professionals. By renewing its trust, SNCF highlights Crosscall’s ability to design reliable products over time that enable companies to optimize their mobile fleet budget in the long term. The STELLAR-X5, a symbol of technical expertise and durability For this renewal, SNCF chose the STELLAR-X5, Crosscall’s latest model launched in October 2023. This smartphone contains 26% recycled materials, combining performance and responsible approach. Crosscall’s eco-design approach was awarded the EcoVadis Gold medal, placing the company among the top 5% rated for their Corporate Social Responsibility (CSR). The unique design of its smartphones allows Crosscall to offer a longer lifespan than conventional devices, strengthening the brand’s position as a leader in sustainable telephony. An innovative initiative for a circular economy Crosscall stands out with its offer to buy back mobiles at the end of the contract. After 5 years, the smartphones will be repurchased by Crosscall, repaired, and refurbished in France for a second life. This approach aligns with the principles of the circular economy and meets the requirements of the AGEC law. It represents an economical and more responsible solution, perfectly aligned with the public sector’s expectations regarding sustainability. This unprecedented model in telephony demonstrates Crosscall’s foresight and pioneering role in transforming purchasing practices towards a more responsible and sustainable approach, reinforcing the leading position of the French manufacturer.

Crosscall wins the MCx Product of the Year award.
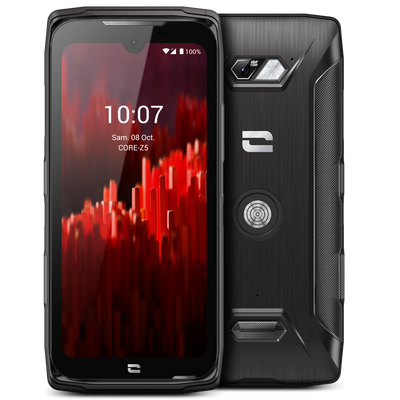
At the Critical Communication World event, Crosscall was awarded the "Best MCX Product of the Year" prize for its CORE-Z5 smartphone. This global award highlights Crosscall's expertise in designing critical communication solutions and its ability to develop innovative products that meet the needs of public and private security professionals. AN INTERNATIONAL AWARD FOR CROSSCALL AND ITS CORE-Z5 Every year, Critical Communication World (CCW) brings together end users of critical communication systems, manufacturers, and suppliers for three days of inspiration, knowledge, and networking. This key industry event is organized by the TCCA (The Critical Communication Association), whose mission is to develop and promote standardized critical communication solutions worldwide. On this occasion, the TCCA hosts the International Critical Communication Awards (ICCA), a ceremony that honors the most innovative initiatives and products internationally. This year, Crosscall, the French manufacturer, stood out with its CORE-Z5 smartphone, which won the "Best MCX Product of the Year" award. This award highlights Crosscall's expertise in designing MCX products, a new standard defined by 3GPP, operating on LTE 4G and 5G networks, where X represents multiple mission-critical services (MC) such as PTT (push to talk, i.e., voice), data, video, and other services. The CORE-Z5 is thus recognized at the highest level by industry professionals as a solution meeting their current and future needs. CRITICAL COMMUNICATION: A SECTOR IN FULL TRANSITION The world of critical communication is undergoing significant transformation. Until now, several technologies equivalent to 2G were mainly used in the public security sector: TETRA, ACROPOL, TETRAPOL, P25… These allow communication over private mobile networks called PMR (Private Mobile Radio), independent mobile networks separate from public mobile networks. These technologies are set to be replaced by new private networks operating on 4G and 5G networks. Thus, old portable communication tools will gradually be replaced by more modern devices. The smartphone will become the ideal tool for security forces, enabling them to access brand-new features, improve operational efficiency in the field, and be interoperable. Indeed, in addition to voice communications, they will now be able to share data, photos, videos, and real-time location simultaneously with multiple people. However, compatibility with private networks and priority access to them remain essential to make the smartphone an MCX tool. For this, smartphones must be compatible with certain specific frequency bands. This is an expertise Crosscall has developed in recent years, allowing it to develop, in technological partnership with Qualcomm, the CORE-Z5, the world's first smartphone compatible with band 68, a frequency band dedicated to public security in most European countries. This innovation now allows the French manufacturer to stand out and receive an international award. "We are very proud to receive this award. It rewards the work done over several years by our product development and software teams. It is a milestone for Crosscall and a top-level recognition that establishes our expertise in the critical communication sector." Nicolas Zibell, CEO of Crosscall. CROSSCALL, EUROPEAN SPECIALIST IN CRITICAL COMMUNICATION Crosscall has demonstrated its expertise in the critical communication sector by developing innovative products and solutions and providing professionals with solutions that meet their specific needs. The manufacturer also helps advance this sector by working on large-scale international projects, such as Broadway, a project aimed at defining, developing, and testing next-generation critical communication solutions for public security organizations across Europe. Thus, Crosscall is one of the first manufacturers to work on supporting eMBMS (evolved Multimedia Broadcast Multicast Services), which enables "point-to-multipoint" content distribution. Thanks to this, multiple terminals can receive information that the antenna sends to everyone instead of receiving it separately. Support for this feature complements that of band 68. Indeed, this band has a width of 5 MHz, which, in the event of major events or crises, may be insufficient to support multiple video streams shared among several people. Thus, in the future, public security forces will be more connected. They will be equipped with smartphones and dedicated accessories allowing them to manage all their missions wherever they are, more quickly while minimizing risks on the ground. This is a central aspect for the safety of populations, especially the security of major events in which Crosscall and its products are directly involved. At COP 27, held in Dubai at the end of 2023, Crosscall helped ensure the smooth running and security of participants at this international event gathering 196 states around the issue of climate change. The critical communication system implemented, based on Crosscall's reliable and durable terminals, facilitated coordination of involved units and incident management during these important days. A real-life experience that will benefit the French Ministry of the Interior during another major event, the Paris 2024 Olympic Games, where Crosscall terminals will support police and gendarmes mobilized to ensure festive and safe games for the public. This solution replacing conventional radios offers agents better network quality and communication continuity, relying on a smartphone and Crosscall's X-COMM remote microphone, adapted to their operational needs.
Crosscall, winner of the French Tech 120 program for the fourth time
This year again, the French Tech Mission has selected Crosscall, for the fourth time in 5 years, in the annual French Tech 120 cohort. The Aix-en-Provence brand was chosen among 120 French start-ups and scale-ups capable of becoming world-class technology leaders. An increasingly demanding selection for this new edition, based on economic performance criteria as well as a number of social and environmental commitments. Crosscall, the French manufacturer of ultra-resistant and durable smartphones and tablets, has established itself as a French technological flagship by offering increasingly sovereign and sustainable solutions. Since its creation in 2009, the Aix-en-Provence scale-up has become a reference in business telephony. The brand was recently chosen by the specialized retail chain Leroy Merlin to equip its 30,000 employees and continues its international expansion by positioning itself in markets related to critical communication, a strategic focus in Crosscall's development. The selection criteria for this fifth cohort have evolved to give a central place to commitments related to ecological transition and gender parity. Strategic points for Crosscall, which was awarded an EcoVadis Gold medal placing it in the TOP 5% of the best performing companies in CSR. Among the actions taken by the company, we can mention its ability to extend the lifespan of its devices guaranteed for 5 years as well as the new eco-design approaches developed with the STELLAR-X5, the latest smartphone from the French brand containing 26% recycled materials. On this occasion, Crosscall developed its first carbon footprint, allowing it to measure the real impact of the smartphone throughout its life cycle and to go further in its eco-design approach in the future. Crosscall also stood out for its gender equality index: the score of 84/100 highlights the French company's initiatives to ensure the representation of women in its leadership bodies and reduce salary gaps between women and men holding similar positions. By joining the French Tech 120, Crosscall will benefit from close support from all relevant administrations to continue its development and its ambition to establish itself as a new leader in mobile telephony internationally.

CROSSCALL: A CERTIFIED AFTER-SALES SERVICE AND REFURBISHED PRODUCTS GUARANTEED "SERVICE FRANCE"
Since its creation in 2009, the French smartphone and tablet manufacturer Crosscall has always made it a point of honor to maintain close ties with its users. This includes, among other things, a quality customer service, offering responsiveness and efficiency also enabled by a local presence and a majority of jobs in France. A certified customer service Building on this positioning, Crosscall has continued this long-term effort and today reaches a new milestone: the company has just obtained the Service France Garanti certification for its after-sales and refurbished services, which therefore concerns the handling for the repair or refurbishment of its products. An achievement that rewards years of good practices, an absolute commitment to further extend the lifespan of its products and give them a second life, as well as building a relationship of trust with its customers. So, what is the Service France Garanti? It is a certificate of compliance, guaranteeing that the company meets the following two cumulative criteria: - 90% of the workforce involved in after-sales and refurbishment services is under a French labor contract. - 90% of the workforce in direct contact with the customer is under a French labor contract. True service proximity What does this imply more concretely? First of all, that devices circulate more quickly between the customer and the company, given their proximity within the territory. These devices also benefit from “French-style” expertise during their handling. Moreover, the customer has an efficient, responsive contact person who speaks the same language, allowing a relationship of trust to be maintained throughout their exchanges. All this takes place with complete transparency regarding the device handling chain. In summary, a substantial saving of time, money, and energy for all parties. This achievement fully aligns with the company’s CSR policy, one of whose pillars is to develop its local involvement. A new proof of its commitment to successfully achieving this goal and strengthening its status as a French company!

How to Back Up and Transfer Your Data on Android
Are you changing phones or need to send it for repair? Learn how to back up data from your old phone to easily restore it on your new Crosscall device. HOW TO BACK UP YOUR DATA VIA THE CLOUD? Photos and videos: 1 . Open the Google Photos app 2. Sign in to your Google account 3. At the top of the screen, tap Menu 4. Select Settings > Backup and Sync 5. Enable the Backup and Sync option For optimal quality, we recommend choosing the original quality backup option in Google Photos to preserve the flawless quality of images captured during your adventures. Files and folders: 1. Open the Google Drive app 2. Tap Add 3. Tap Import 4. Specify the location of the files to import, then tap those files. 5. Check that your files have been successfully imported! Data and settings: 1 . Open the Settings app 2. Tap System > Advanced Options > Backup 3. Tap Back Up Now For a complete backup, enable the Google One Backup option to enjoy secure and extended storage. WhatsApp data: 1. Open the WhatsApp app 2. Select the three dots at the top right 3. Select Settings > Chats > Chat Backup > Back Up HOW TO BACK UP YOUR DATA ON YOUR COMPUTER? Photos and videos: 1. Connect your device to the computer via your USB cable, your X-DOCK station, or X-CABLE 2. Select File Transfer 3. Find your photos and videos in Shared Internal Storage > DCIM 4. Transfer your data either to your computer or to your SD card For Windows users, discover Quick Share to easily transfer your files between devices. Files and folders: 1 . Connect your device to the computer via your USB cable, your X-DOCK station, or X-CABLE 2. Select File Transfer 3. Find your files in Shared Internal Storage 4. Transfer your data either to your computer or to your SD card If you transfer your data to a Mac computer, you will need to download software like Android File Transfer. HOW TO RESTORE YOUR DATA AND SETTINGS? When you get your new Android phone: 1. Sign in to your Google account during setup. 2. Enable automatic restoration to recover your backed-up data. For content transferred to a computer or SD card, simply drag the files into the corresponding folders on your smartphone. On Mac, use Android File Transfer for the transfer. For data backed up on Google Drive or Google Photos, follow the corresponding restoration steps on your new device. Stay calm with your data well secured.

Orange Business and Crosscall win the LEROY MERLIN tender
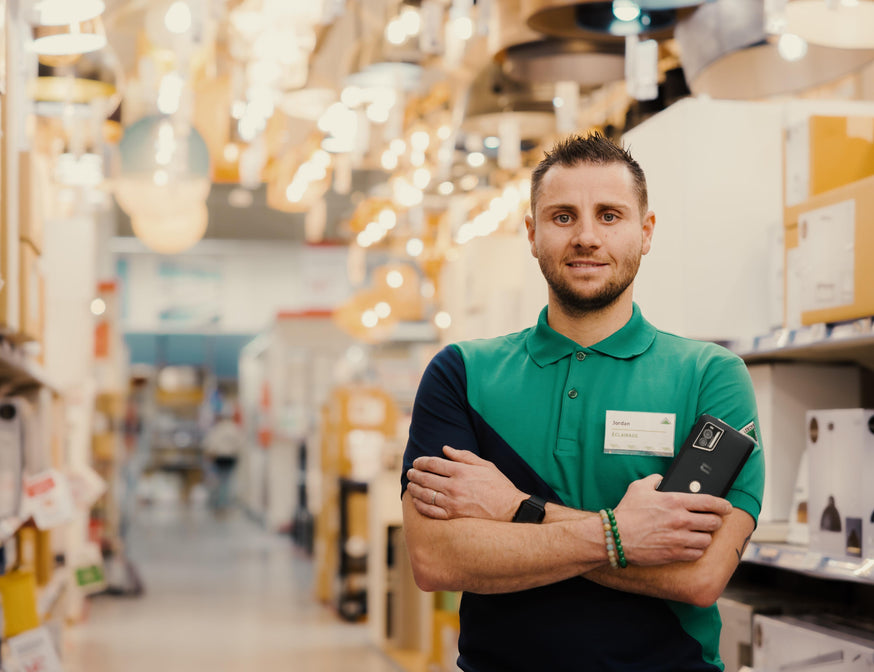
With Orange Business and Crosscall, Leroy Merlin will continue its digital and sustainable transformation, providing an ever more efficient and personalized service to its customers. Thanks to the high quality of the operator’s services and the innovative “all-in-one” approach of the French manufacturer, Orange Business and Crosscall will equip and connect all Leroy Merlin employees for an unprecedented duration of 5 years. More than 30,000 rugged and durable devices will be used by the various trades of the leader in home improvement on the French market. One of the French public’s favorite brands equipped by a 100% French duo The technical quality and durability of the devices, combined with the Orange Leasing mobile fleet rental service based on the circular economy model, enabled Orange Business and Crosscall to stand out and win the tender launched by Leroy Merlin for the renewal of its mobile fleet. More than 30,000 devices will equip all employees of one of the French public’s favorite brands (Marketing and EY-Parthenon 2023 rankings), in their various roles: sales, in-store customer service, logistics, security, administrative services, and management committees. A success for Orange Business and Crosscall in one of the most significant telephony tenders in France in 2023, demonstrating their ability to meet Leroy Merlin’s requirements and the specific needs of its various employees. This is one of the largest B-to-B contracts won by the manufacturer and the first of such scale in the retail sector. More than 29,000 STELLAR-X5, the latest smartphone launched by Crosscall, will equip all Leroy Merlin employees. 3,000 CORE-X5 smartphones will form a shared mobile fleet for additional needs. The Crosscall accessory ecosystem, a true strength of the French brand, was also highly appreciated by Leroy Merlin, which ordered more than 700 X-SCAN, optical scanner modules that turn smartphones into high-performance barcode readers in all situations. “We are proud to support one of the finest French brands and to equip its 30,000 employees with the STELLAR-X5, a smartphone designed to combine technical and environmental performance,” says Cyril Vidal, Founder and President of Crosscall. “We are co-creating with Leroy Merlin a comprehensive approach to support their digital and sustainable transformation. Today, with Crosscall, we are taking a new step together in the shared ambition to reduce the carbon footprint of telecom usage,” says François Fleutiaux, General Manager of Orange Business France.

CROSSCALL ENTERS THE BRITISH AND IRISH MARKETS
Renowned for its robust and innovative mobile solutions, Crosscall is continuing its international development and announces its strategic expansion into the United Kingdom and Ireland. As a pioneer in the outdoor mobile technology market, Crosscall offers waterproof, durable smartphones and tablets with long battery life. Cyril Vidal founded this European leader in 2009 to meet his specific needs, as none of the existing mobile phones met his expectations. The brand has now sold over 4.5 million devices in more than 26 countries, including South Africa. ADDRESSING THE LACK OF CUTTING-EDGE DEVICES IN THE B2B MARKET Faced with a limited offering in the B2B mobile market in the UK and Ireland, Crosscall opens new opportunities with devices combining robustness and aesthetics, effectively bridging the gap between consumer and business needs. Its range of waterproof, durable devices with long battery life promises increased productivity and security at a competitive price, challenging established brands. Moreover, Crosscall is the first and only brand to offer a 5-year warranty on smartphones and tablets, clearly ahead of its competitors in this regard. The brand’s presence in the UK and Irish markets is based on the company’s commitment to sustainability, offering a particularly attractive Total Cost of Ownership (TCO) for the B2B market. Crosscall’s user-centered approach to innovation means exceptional value and quality, thanks to its cutting-edge R&D service based in southern France. As the only manufacturer of smartphones and tablets offering a 5-year warranty, Crosscall stands out with its rugged smartphones featuring excellent design, user experience, and functionalities, rivaling all consumer devices. Crosscall’s offering covers not only hardware but also software and services. The company’s clients have previously been impressed by personalized services deploying solutions perfectly tailored to their needs. Innovations often stem from customer requests, transforming needs into new accessories, features, or applications. Specific functionalities, such as scanning solutions or Push-to-Talk (PTT) with prior licensing, have been developed over the years to meet customer wishes. Enhanced by a range of accessories and customizable B2B applications, the brand’s smartphones and tablets provide tailored solutions that facilitate business activities in all contexts, including harsh outdoor conditions. Furthermore, all devices Crosscall offers in the UK and Ireland are certified Android Enterprise Recommended. The growth of the BYOD (Bring Your Own Device) market, especially in hospitality, healthcare, retail, and logistics sectors, opens interesting opportunities for Crosscall’s versatile devices. In addition to being durable, Crosscall devices feature a dual SIM system allowing them to meet the needs of businesses seeking a single device for their employees: a mobile phone or tablet that withstands professional demands while integrating a highly appreciated aesthetic without sacrificing functionality. B2G OPPORTUNITIES THANKS TO STRONG EXPERIENCE Crosscall is also well positioned to have a significant impact on B2G (business-to-government) demand and the mission-critical communications market through the emergency services network (ESN) tender. The UK government indeed plans to transition from the current radio service to 4G and 5G technologies. This transition will enable frontline workers to quickly access critical and vital information, including real-time data and images, during emergencies. Crosscall’s proven experience in continental Europe and other regions demonstrates its ability to provide durable, large-scale communication tools that play a vital role for emergency and public safety personnel. Having established a strong presence in the European market with renowned clients such as SNCF (the French public railway company and the continent’s second-largest rail network), the French police and gendarmerie, and Swissport, Crosscall is ready to continue its international growth and innovations. This manufacturer of durable smartphones and tablets has already deployed over 350,000 devices in the security and defense industry. MATTHEW BURCHELL LEADS CROSSCALL’S LAUNCH IN THE UK AND IRISH MARKETS To strengthen this international expansion, Matthew Burchell will take on the role of Business Development Director for the UK and Ireland, leading development efforts in the region. Although his arrival at Crosscall is recent, his deep knowledge of the technology market is undeniable, with nearly a decade of experience in network solutions, automation, and enterprise mobility. “At Crosscall, we are not just going to launch products in the UK and Ireland; we are going to help improve enterprise mobility,” says Matthew Burchell.“Our devices are designed for modern workers, offering an aesthetic look, as well as durability and features that enhance performance.” He adds: “Crosscall is determined to raise the bar for mobile devices in the UK and Ireland, while providing consistent availability of high-quality products and services across Europe, thanks to partnerships with leading mobile service providers, value-added resellers, independent software vendors, and distributors.”