Choisissez votre pays et votre langue
How does GPS work?
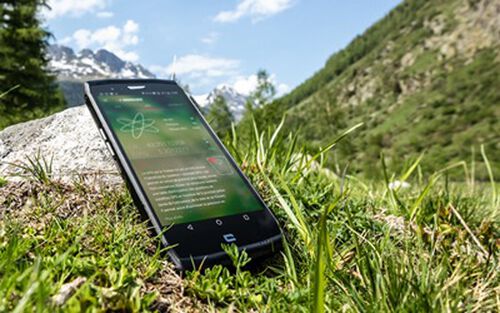
The Global Positioning System (GPS) is a system of American satellites orbiting above the Earth. By receiving their signals, your smartphone is able to determine your position in real time, regardless of its connection to a telephone or Internet network (Wifi, 3G / 4G...).
GPS, on the other hand, is only used for geolocation. To obtain all other information, such as the background maps you'll need to visualize your position and find your way around, you'll need a dedicated application, pre-installed on your phone or available from Play Store.
At some point, you'll also need an Internet connection to access and download the maps.
For even faster, more precise positioning, smartphones CROSSCALL* smartphones feature two other geolocation systems in addition to GPS: A-GPS** and GLONASS***.
*For TREKKER-S1, TREKKER-X2, TREKKER-M1 and TREKKER-M1 Core models.
*A-GPS (or Assisted-GPS) provides assistance to GPS. It provides more precise location data and speeds up the search for your position using an internet connection or 3G / 4G network in areas poorly covered by GPS (dense urban areas, buildings, tunnels, etc.).
**GLONASS is the Russian satellite system, analogous to the American GPS system.
A GPS for every application
GPS with online maps
This type of application requires an active Internet connection to provide its full range of services, but does not require any configuration prior to your outdoor outing. GPS positioning is coupled with information downloaded and updated in real time, to keep you as close as possible to reality (e.g. traffic, itineraries, etc.). These applications include Google Maps, Tomtom and Mappy.
GPS with off-line maps
These navigation systems do not require an active network connection to locate you on a map. However, they do require you to download a map of the place or region you intend to visit before you set off. If you're planning to get off the beaten track and need to check your itinerary even when you're off the grid, this is the solution for you. Maps.me, Orux Maps, Visorando, Peakhunter and ViewRanger are just some of the applications of this type.
While GPS units with on-line maps are ideal for road travel, GPS units with off-line maps are more suitable for outdoor use.
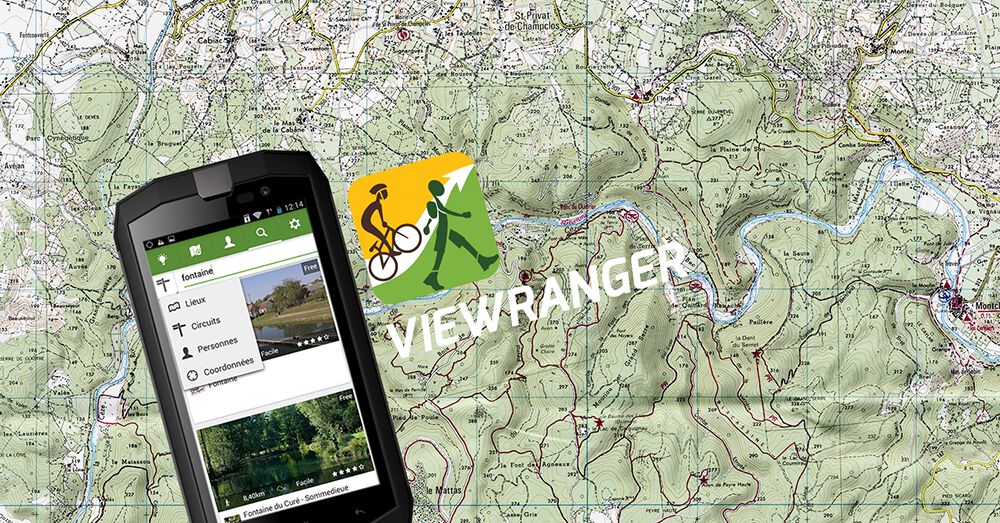
To help you understand how an "On-board" app works, we've chosen to show you how to use your smartphone's GPS. CROSSCALL smartphone through the ViewRanger application by answering 3 questions:
- how to save a trail?
- how to use it offline?
- how to import a map from your computer into the application?
Follow the guide*!
*Tests were carried out with a TREKKER-M1.
HOW TO RECORD A TRACK ON VIEW RANGER IN CONNECTED MODE?
-
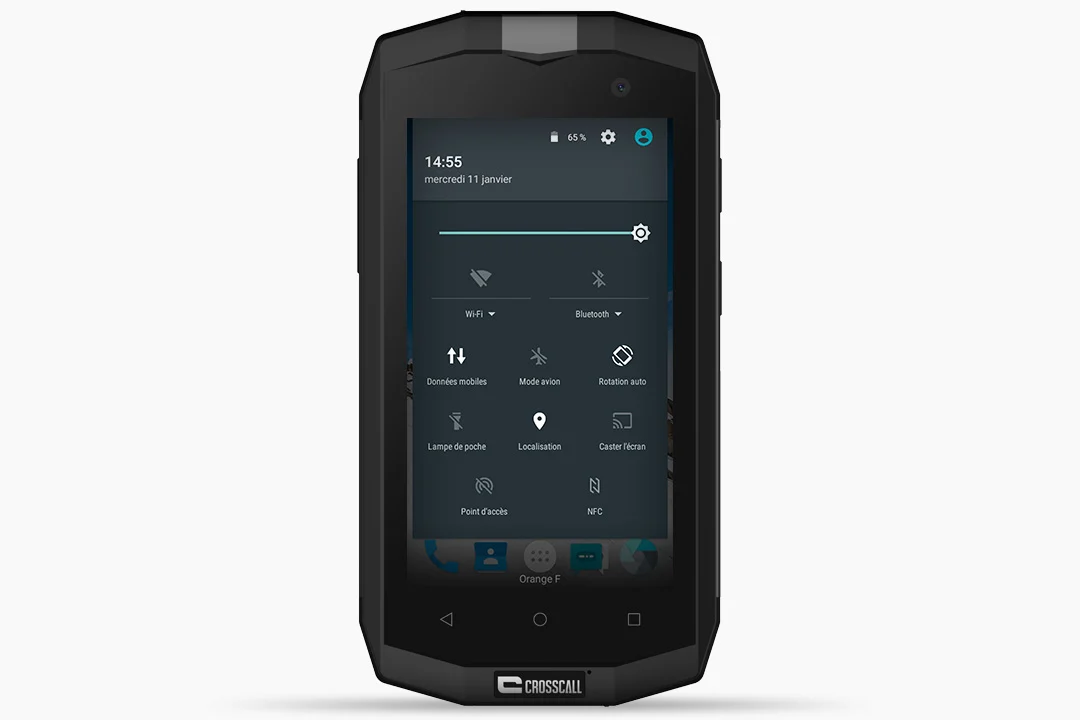
Activate your smartphone's GPS by "swiping" up and down on your screen, and select " Location " as well as " Mobile Data " for better geolocation.
-
Open the ViewRanger application you've downloaded from the Play Store.
-
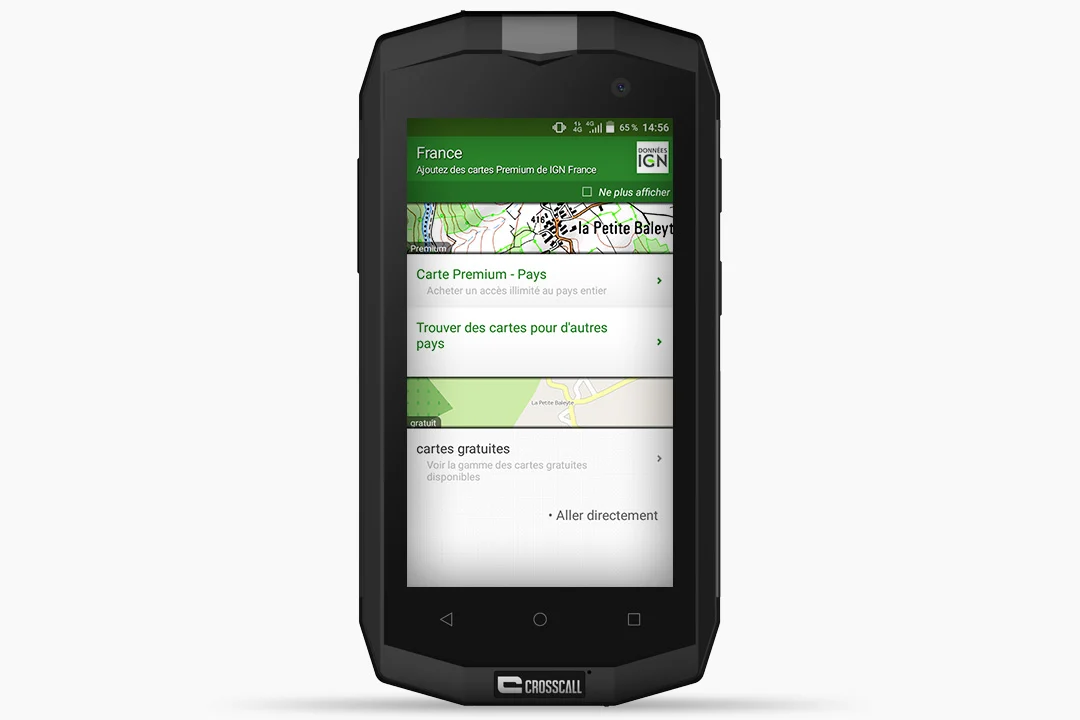
The application offers access to open source maps or premium maps (available by subscription*). Select " Go directly " to use the free version straight away.
-
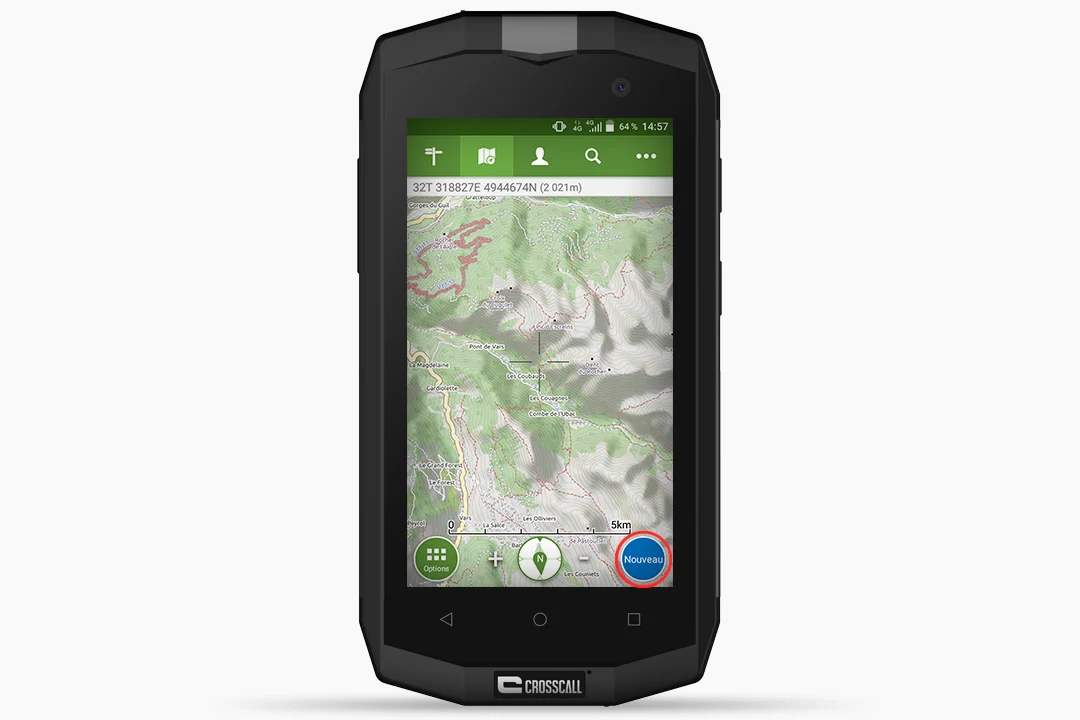
Press the " New " button at the bottom right of your screen.
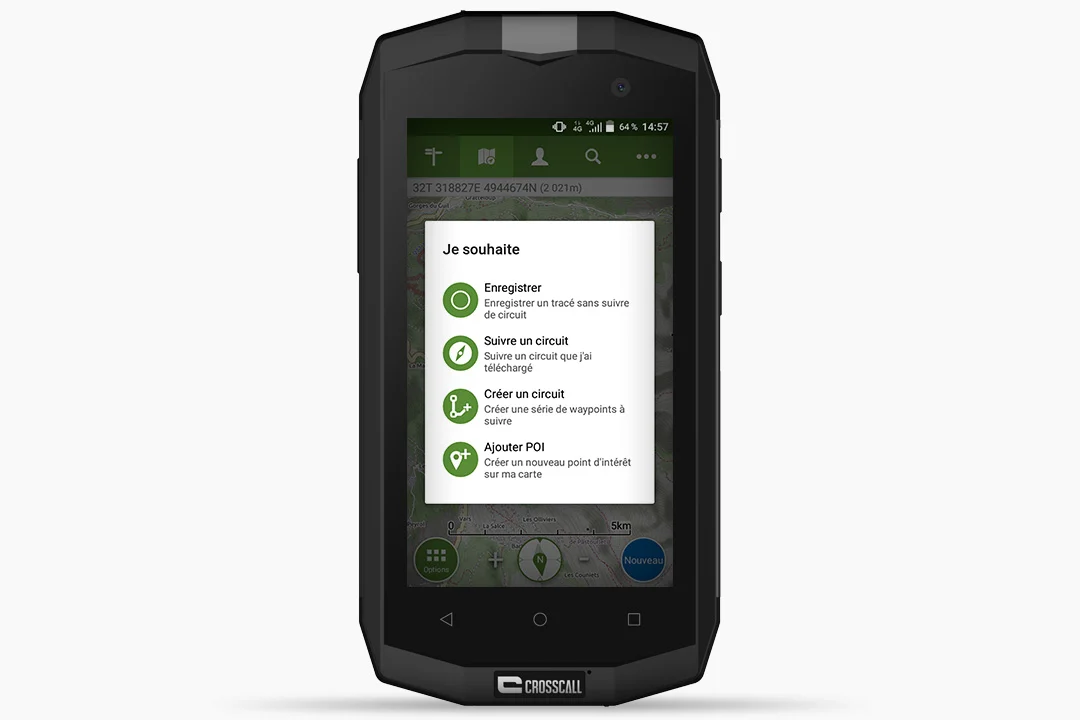
Several options appear. -
Select " Save ".
-
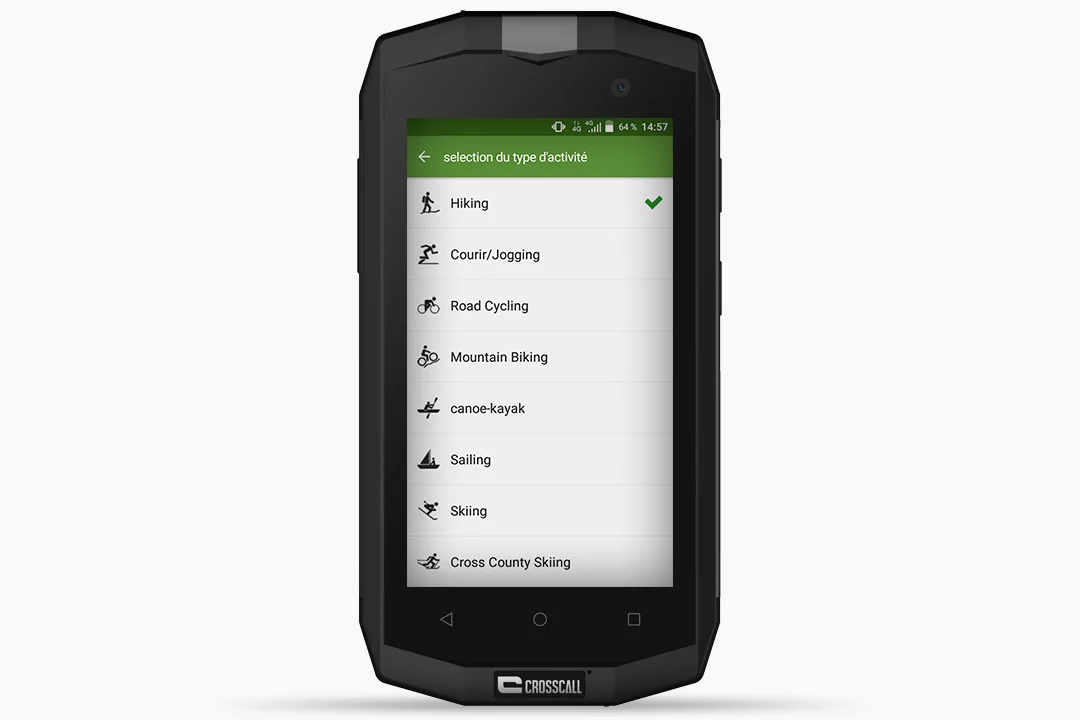
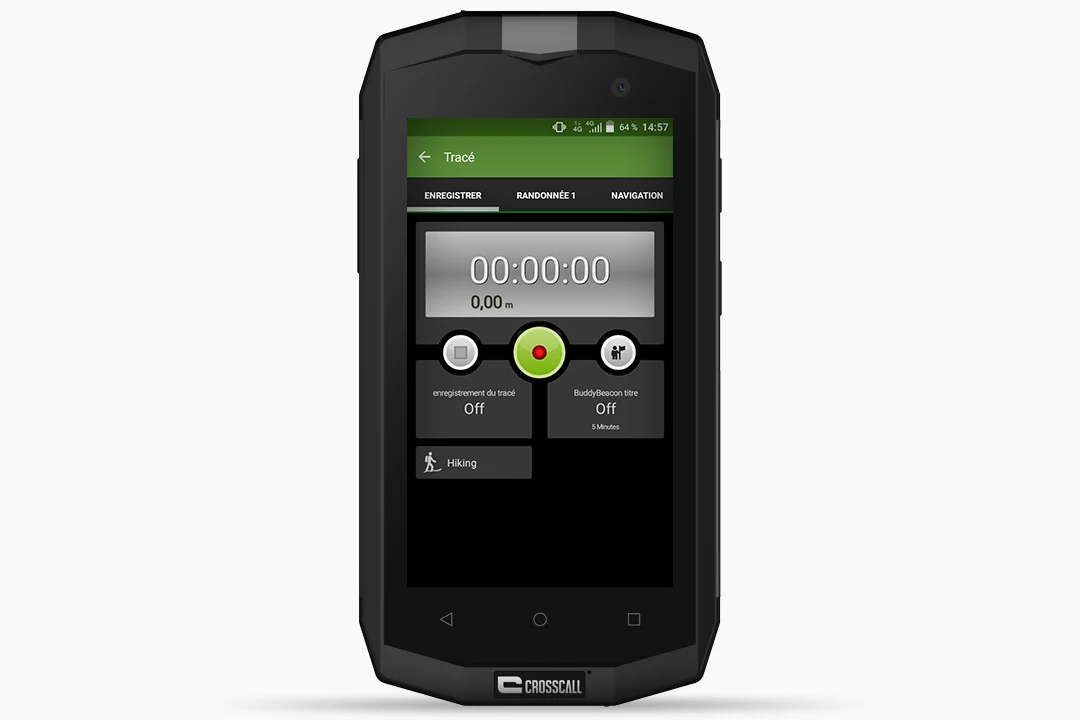
Choose your sport.
-
Then press the record button (red) to start tracking your trail. You can choose to pause it by pressing the record button again. This will give you the real time of your track, without counting your stops.
-
Alongside the " Record " tab, the application provides real-time statistics on your route, such as route length, time, speed, average speed [...].
-
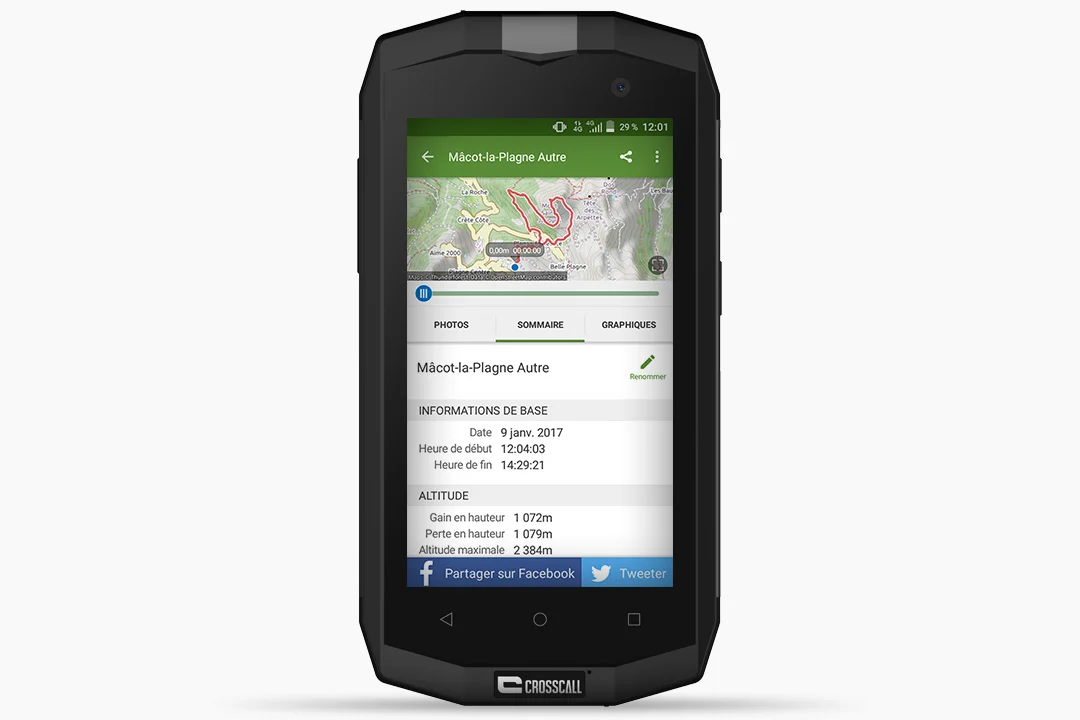
At the end of your outing, press the "square" button (to the left of the record button). Wait a few seconds, the track will be recorded.
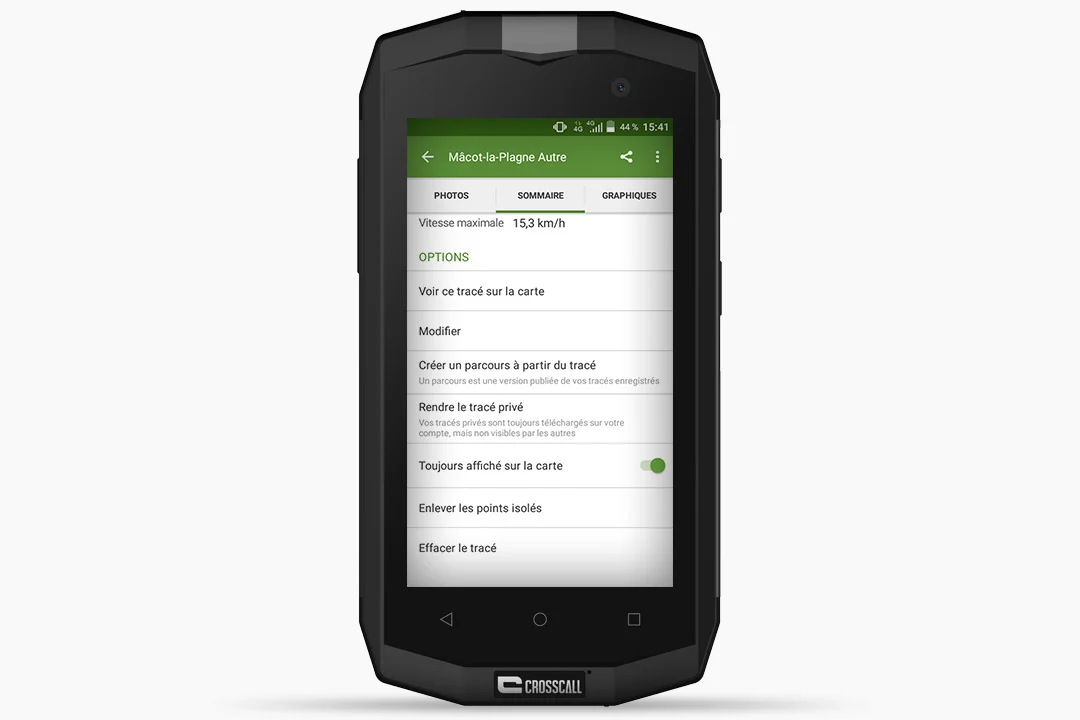
- Your trail will then be saved to your " Profile " in the " TRACES " tab. You can then rename it, share it on Facebook and Twitter, see it plotted on the map or create a new route from it.
*Subscriptions differ from one application to another.
HOW TO USE VIEW RANGER OFFLINE?
This method allows you to save your battery life as much as possible and find your way in areas with little coverage. To do this, you need to download the map you want via an Internet connection.

- Open the ViewRanger application.
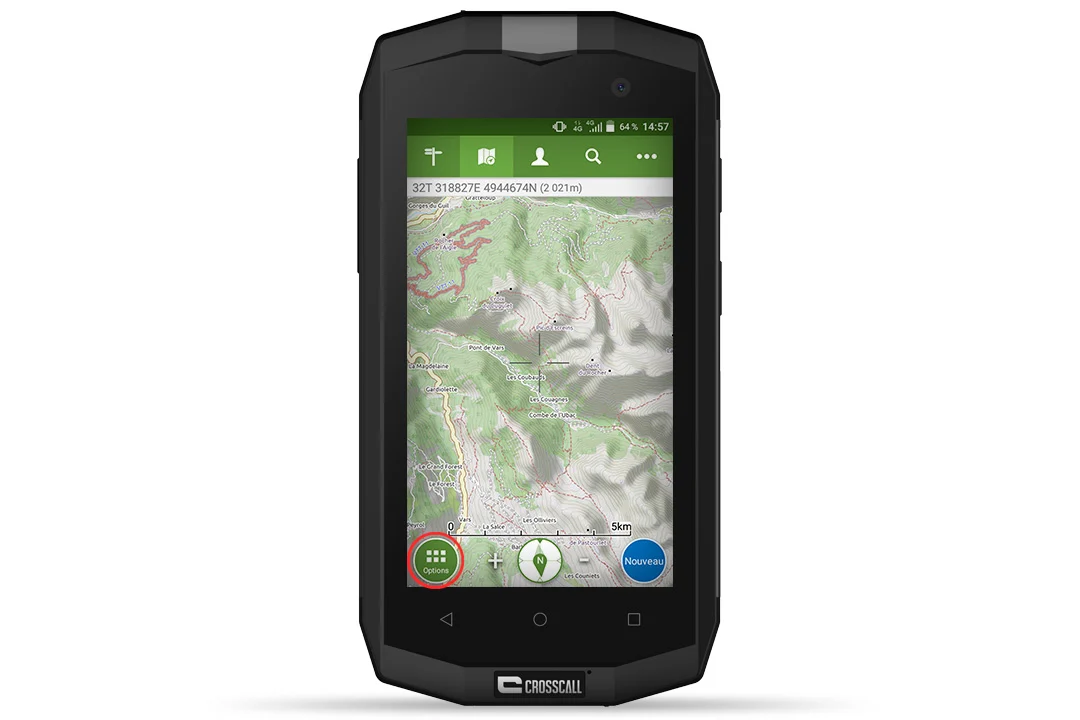
- Click on the " Options " button at the bottom left of your screen.
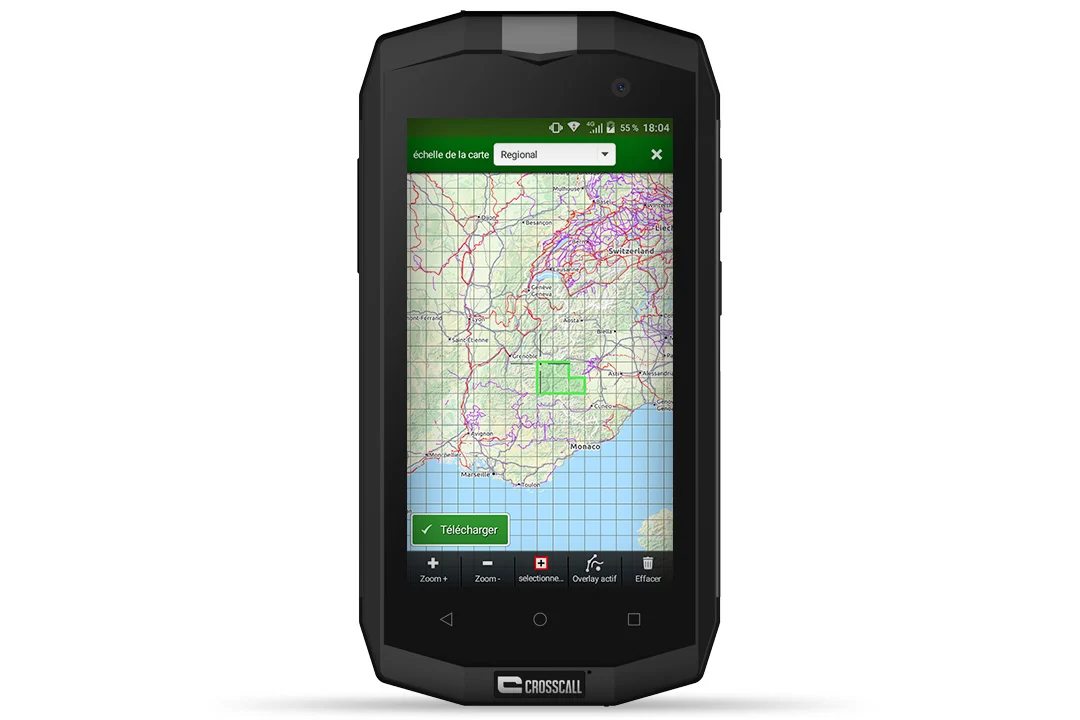
- Click on " Create a registered card ".
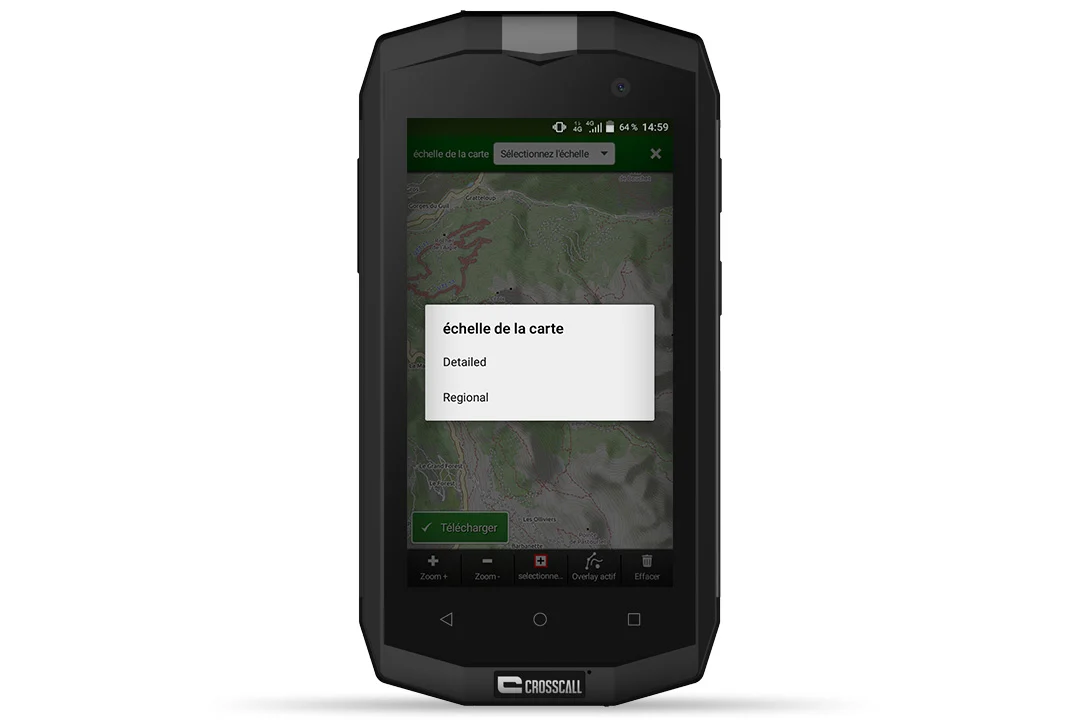
- Choose whether you want a " detailed " or " regional " scale map. Some maps are free to download. The more detailed IGN maps (scales 1:25,000 or 1:100,000) are available by subscription (€5.49 per month or €24.99 per year), unlimited and online throughout France. The choice is yours.
- Then select the geographical area (called a "slab") you wish to cover on your next outing by moving around the map. Then press " Download ".
[Tip: pressing the "Select" button transforms it into a "Move" button].
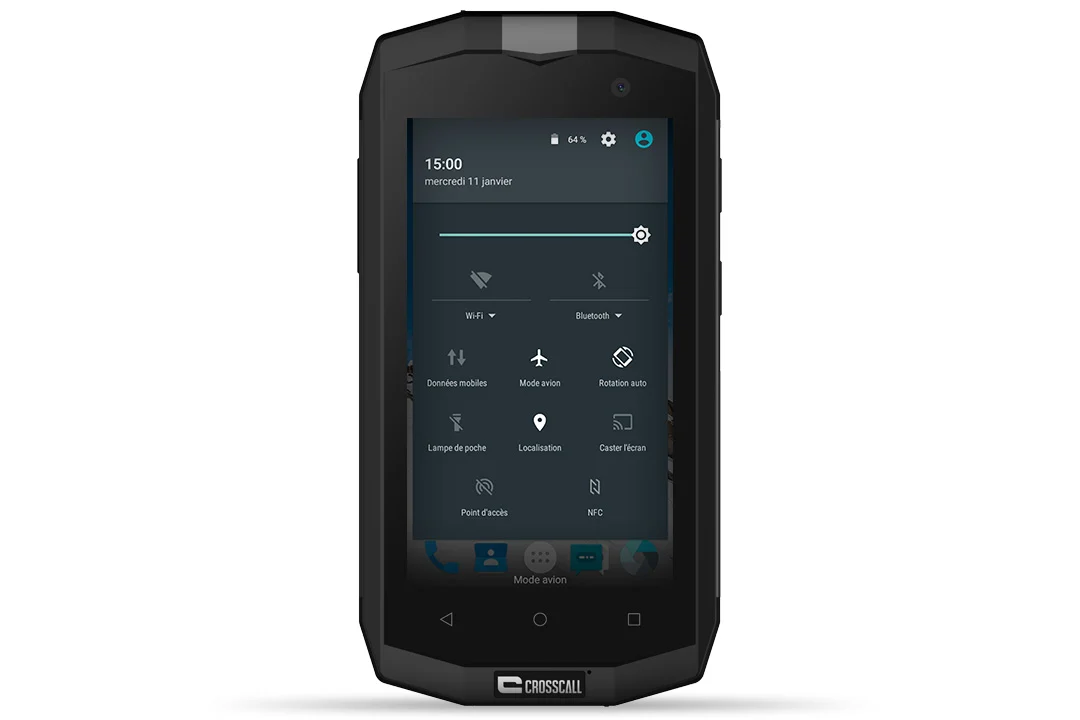
- Drag from top to bottom on your screen. Activate " Airplane mode " and " Location " for GPS, then deselect " Mobile data ".
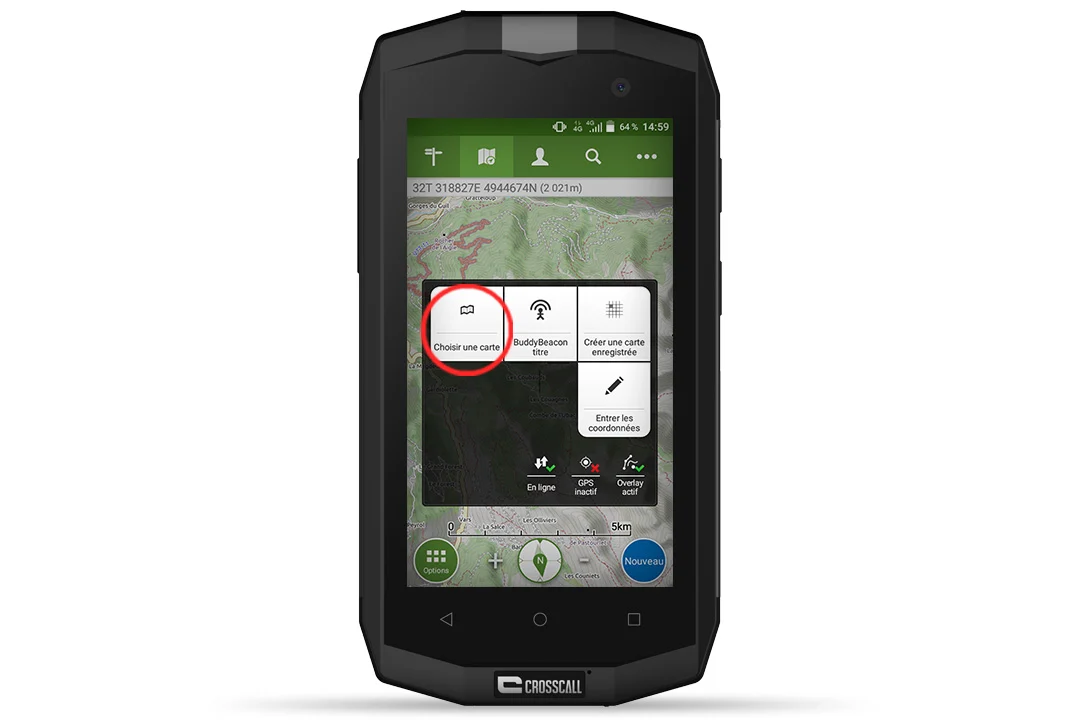
- Select the " Options " button again in View Ranger, " Choose a map ", then " My Maps " and choose from the saved maps.
- Then follow the same steps described above to record your next route or simply geolocate yourself.
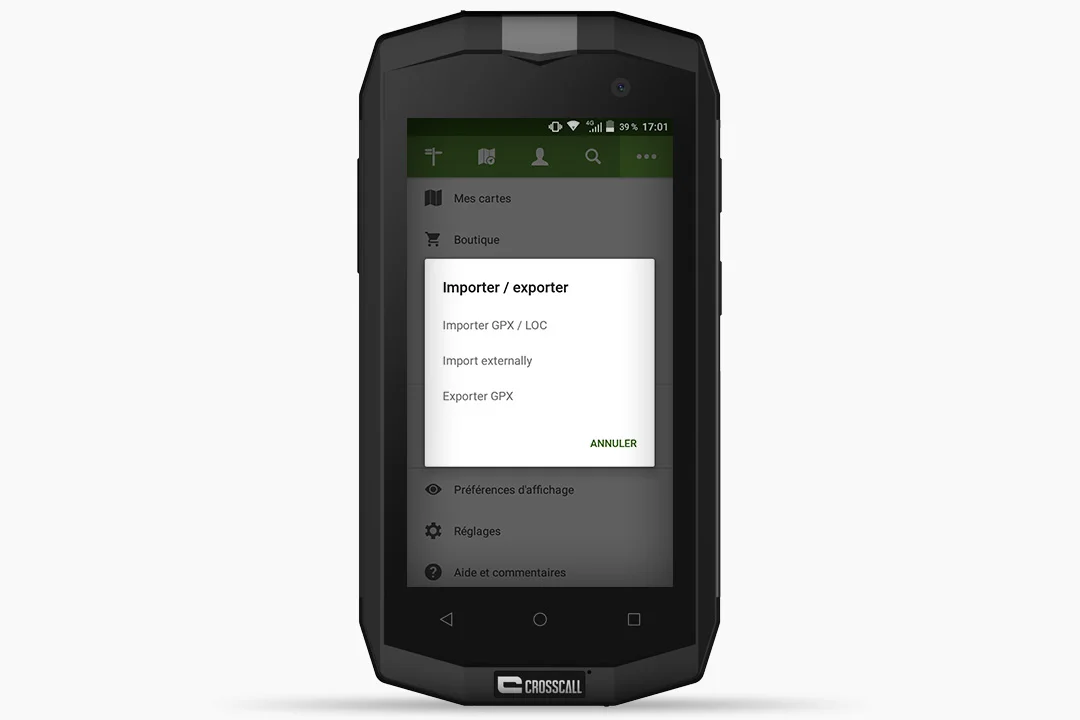
HOW DO I IMPORT A MAP FROM MY COMPUTER INTO VIEW RANGER?
- Transfer your .gpx file from your computer to your phone by email, usb cable or SD card.
- Open the ViewRanger application.
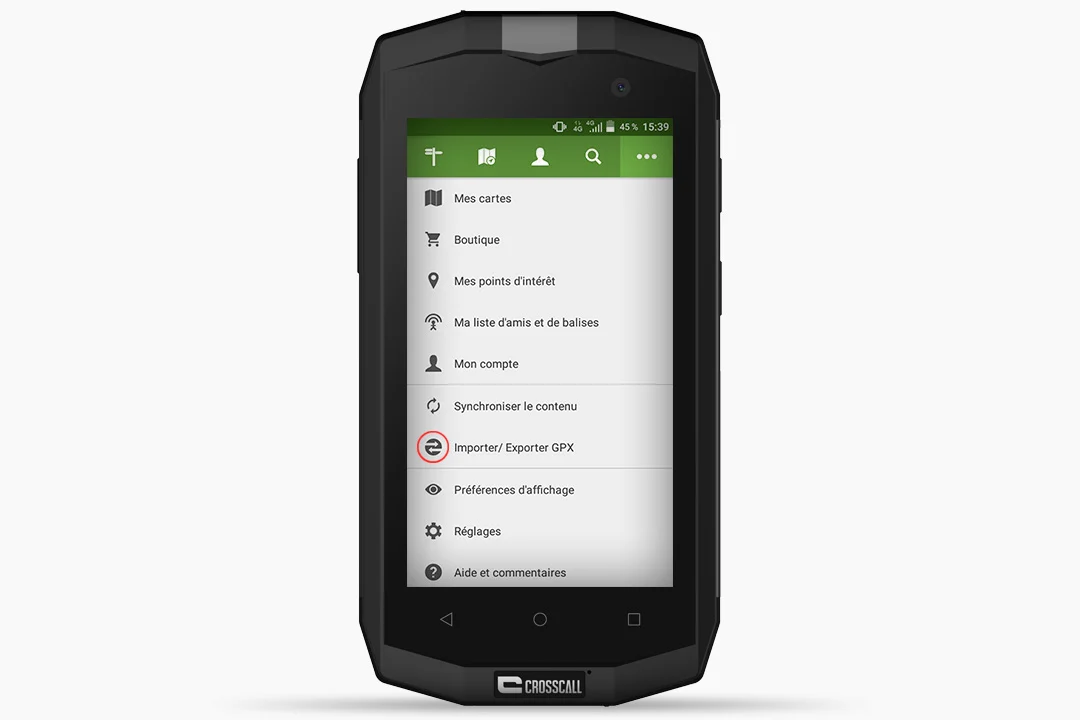
- Click on the " 3 dots " (top right of the screen) and then on " Import / Export GPX ". For our test, we imported the GPX track by e-mail and selected " Import Externally ", then chose the file in the phone's " Download " folder.
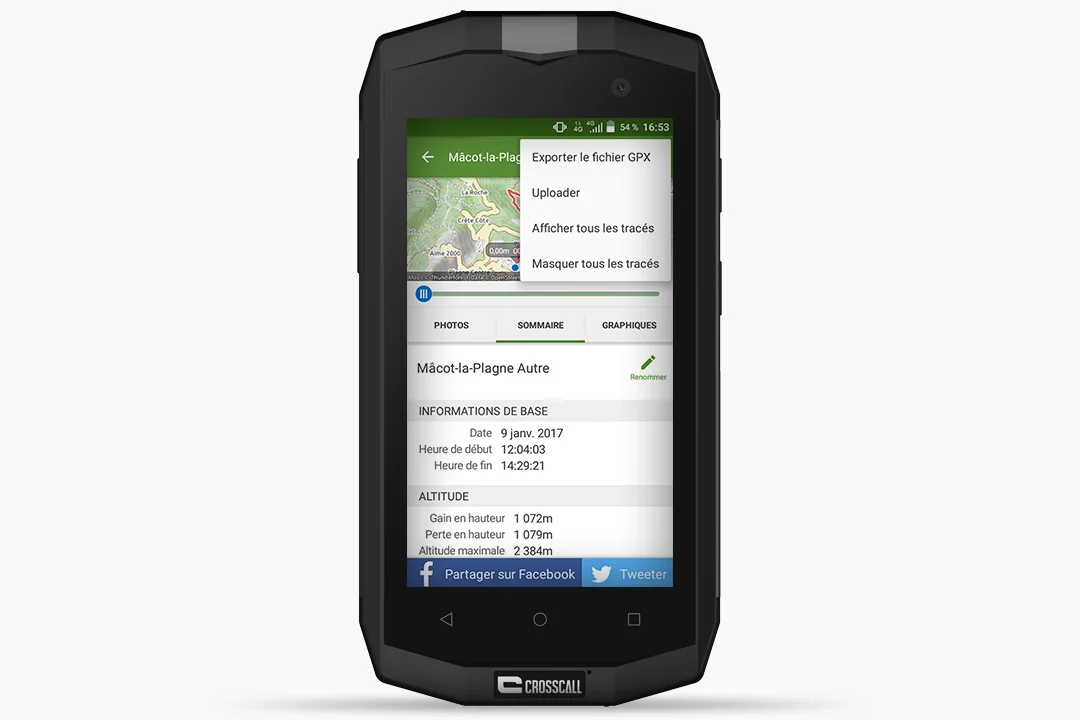
- Return to the application's " Profile " tab. In the " TRACES " section, you'll see that it's " Unsynchronized ".
- Click on the track, then on the " 3 dots " (top right) and finally on " Upload". Your track is now synchronized.
- Still in the " TRACES " section, scroll down. Select " See this trail on the map " to display it, or save your route from the trail by choosing " Create a route from the trail ".

ANDROID TIP: IMPROVE GPS ACCURACY

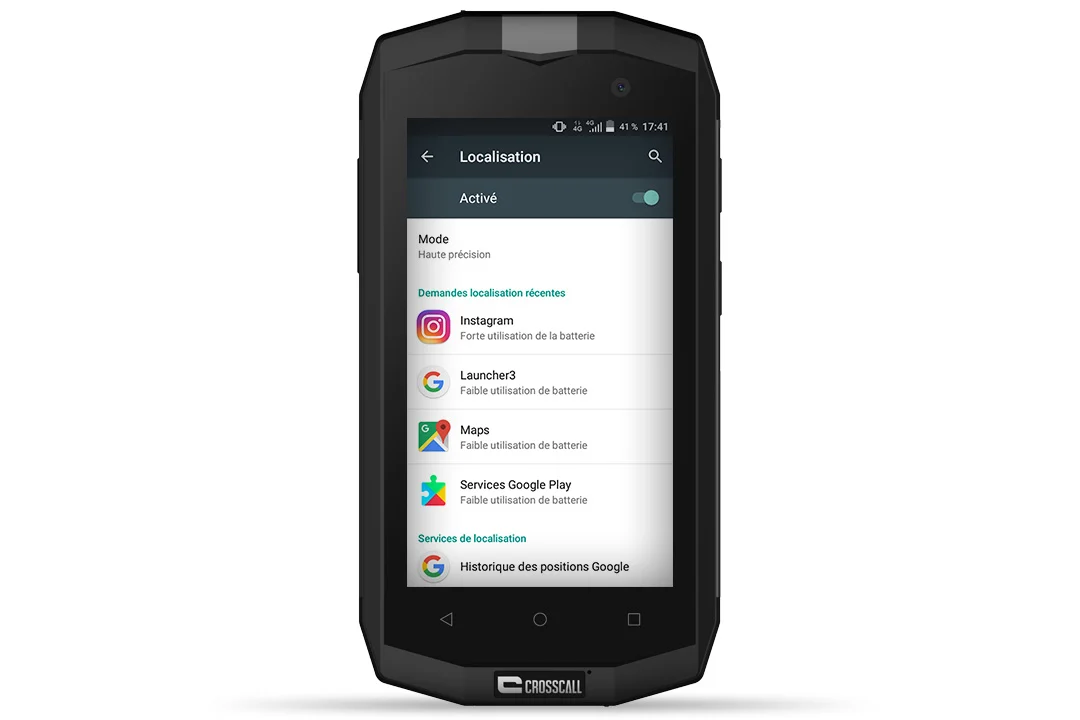

- Go to " Settings " on your smartphone.
- Select " Location ", then activate GPS mode.
- Click on " Mode ", then choose the localization mode to suit your needs.
- 3 options are available
- High precision. Here, GPS, Wi-fi and mobile data are called upon for the best possible geolocation. On the other hand, this positioning mode will consume a lot of power.
- Battery saving. This mode calculates your position by tapping into the WiFi network. As its name suggests, it will enable you to optimize your smartphone's battery life on a day-to-day basis, and to use geolocation-enabled applications (weather, social networks, etc.). However, this mode will not enable you to use your GPS accurately for outdoor activities.
- Device only. Only GPS will be used to determine position. Coupled with airplane mode, you'll break records in terms of autonomy, and you won't exhaust your Internet package. Extremely practical in areas where there's no network, or if you need to find your way around abroad!